РЫЧАГ ПЕРЕКЛЮЧЕНИЯ ПЕРЕДАЧ В СБОРЕ (для моделей с кузовом типа "седан") > УСТАНОВКА |
| 1. INSTALL SHIFT LEVER ASSEMBLY |
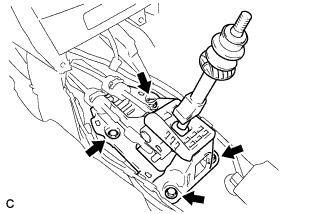 |
Install the shift lever assembly with the 4 bolts.
| 2. INSTALL TRANSMISSION CONTROL CABLE ASSEMBLY |
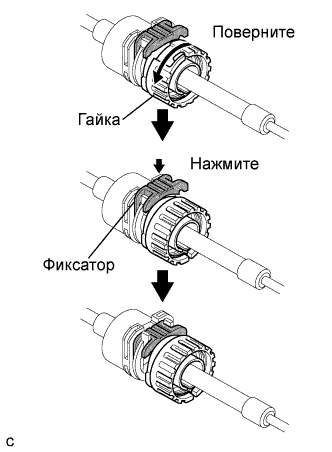 |
Rotate the transmission control cable nut counterclockwise approximately 180° and, while holding the nut in that position, press in the stopper until it makes 2 "click" sounds.
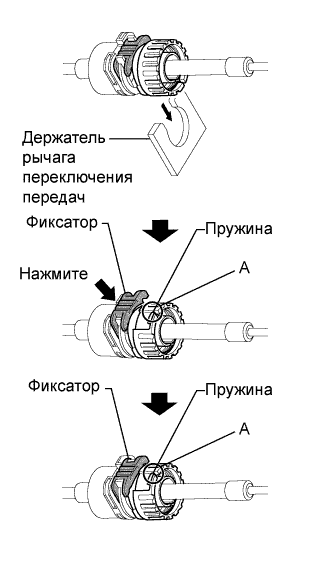 |
Install the cable outer of the transmission control cable to the shift lever retainer, check that the position of the spring is the same as A shown in the illustration, and press in the stopper.
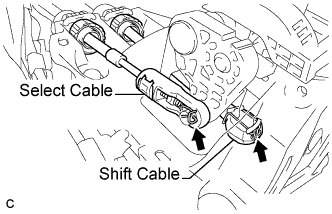 |
Install the control shift cable to the shift lever assembly.
Install the control select cable to the shift lever assembly.
Install the clip to the shift lever.
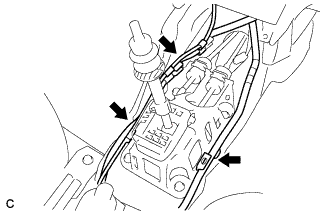 |
Install the wire harness to the shift lever assembly with the 3 clamps.
| 3. ADJUST TRANSMISSION CONTROL SELECT CABLE |
Install the transmission control cable assembly to the manual transaxle.
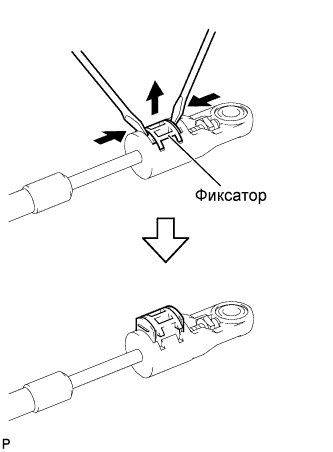 |
Using 2 screwdrivers, pull the lock piece outward from the adjuster case.
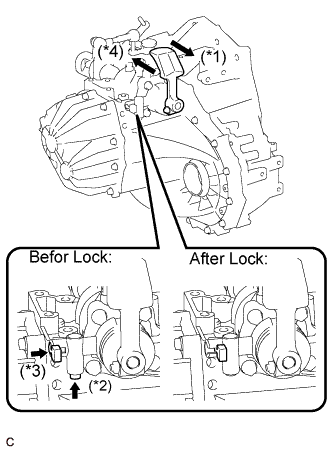 |
Lock the shift system fixing pin for reverse inhibitor.
Move the shaft in the arrow (*1) direction until it is locked (shaft stroke 15 mm (0.59 in.)).
Press the pin in the arrow (*3) direction until it is locked while pushing the button in the arrow (*2) direction.
While pressing the pin, move the shaft in the arrow (*4) direction until it is locked (shaft stroke 7.3 mm (0.29 in.)).
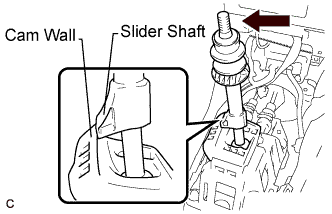 |
Push the slider shaft until it contacts the cam wall.
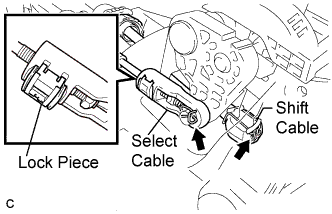 |
Install the control shift cable to the shift lever assembly.
Install the control select cable to the shift lever assembly.
Install the clip to the shift lever.
Press in the lock piece to the adjuster case.
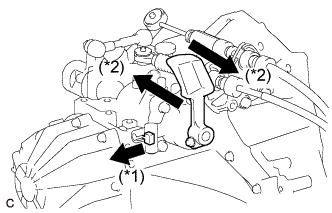 |
Release the shift system fixing pin for reverse inhibitor.
Move the pin in the arrow (*1) direction until it is locked (pin stroke 8.5 mm (0.33 in.)).
Check that the pin is released by moving the shaft in the arrow (*2) direction.
| 4. INSTALL REAR CONSOLE BOX ASSEMBLY |
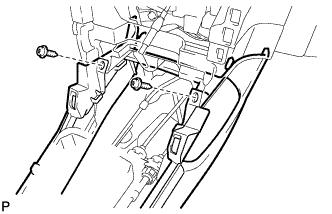 |
Вверните 2 винта.
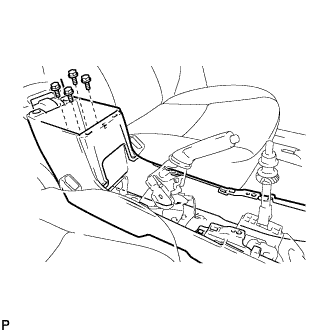 |
Установите вещевой ящик в облицовке туннеля пола и закрепите его 4 болтами.
| 5. INSTALL CONSOLE BOX CARPET |
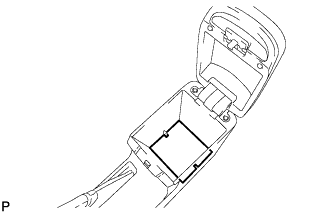 |
Установите коврик вещевого ящика в облицовке туннеля пола.
| 6. INSTALL UPPER CONSOLE PANEL SUB-ASSEMBLY |
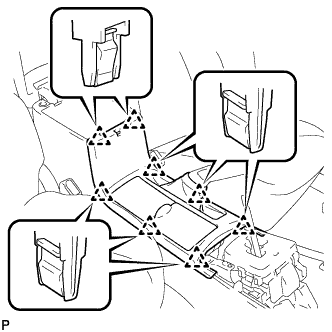 |
Установите верхнюю панель консоли и закрепите ее 8 фиксаторами.
| 7. INSTALL FRONT NO. 1 CONSOLE BOX INSERT |
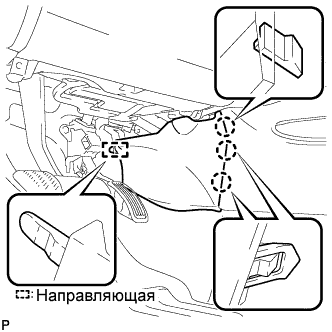 |
Введите в зацепление направляющую.
Введите в зацепление 3 захвата и установите переднюю вставку вещевого ящика в облицовке туннеля пола № 1.
| 8. INSTALL FRONT NO. 2 CONSOLE BOX INSERT |
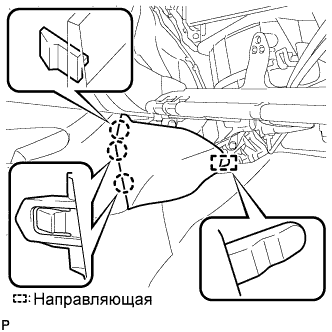 |
Введите в зацепление направляющую.
Введите в зацепление 3 захвата и установите переднюю вставку вещевого ящика в облицовке туннеля пола № 2.
| 9. INSTALL INSTRUMENT PANEL BOX ASSEMBLY |
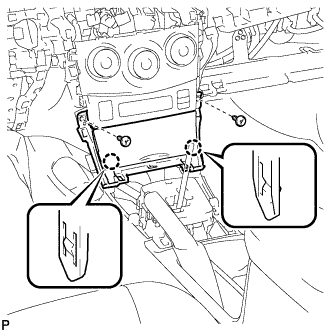 |
Введите в зацепление 2 захвата.
Установите ящик панели приборов и закрепите ее 2 винтами <B>.
| 10. INSTALL CENTER INSTRUMENT CLUSTER FINISH PANEL ASSEMBLY |
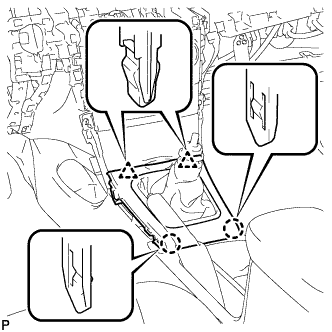 |
Введите в зацепление 2 захвата и 2 фиксатора и установите центральную облицовку панели управления.
| 11. INSTALL SHIFT LEVER KNOB SUB-ASSEMBLY |
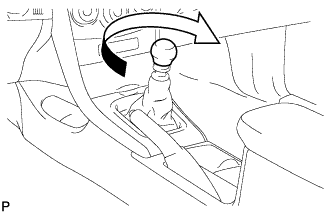 |
Поверните рукоятку рычага переключения передач по часовой стрелке и закрепите ее.
| 12. INSTALL LOWER INSTRUMENT PANEL FINISH PANEL LH |
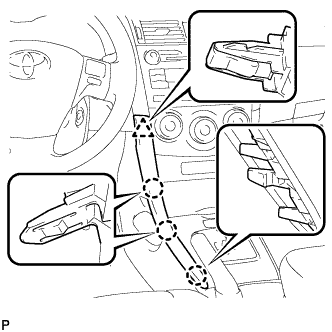 |
Введите в зацепление 3 захвата и фиксатор и установите левую нижнюю отделочную накладку панели приборов.
| 13. INSTALL LOWER INSTRUMENT PANEL FINISH PANEL RH |
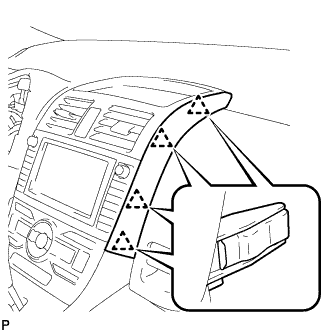 |
Введите в зацепление 4 фиксатора и установите правую отделочную накладку панели приборов.